Showing posts with label 4 stars. Show all posts

Thursday, February 28, 2013

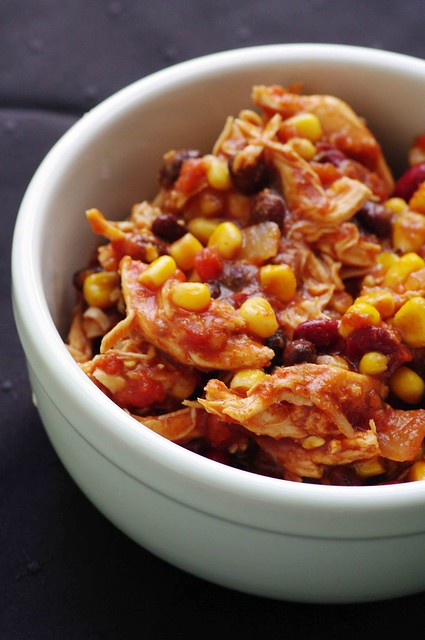
Crock Pot Chicken Taco Chili

Perfect meal for moving week. Or in our case, moving month. We closed on our house 2 weeks ago and it has been the longest 2 weeks of my life (besides the last 2 weeks of my pregnancy with Logan, of course). We have been so busy washing, repairing, painting, washing, cleaning, ripping out carpet, and the list goes on. Buying a foreclosure is a lot of work. But, I do get to make the house what I want so that is great! Yesterday I had a great time trying to fix the garage door by myself with a very unhappy baby while Brian was up at school. It ended with a very hysterical me calling Brian in tears telling him I broke the garage. I didn't, but I felt like  I did. It all ended well, Brian fixed it with little effort and I got to go home and have this for leftovers.
This recipe was a simple throw-everything-in-the-crockpot-and-let-it-cook recipe. Love it. And it made A LOT of soup, so we are having continuous leftovers this week since I have been too busy to cook. I think everyone is sick of chili but I'm not yet. I am a hardcore chili lover. But I think I need to freeze what is left of it and spare my family another meal of leftover chili. I'd give this recipe 4 stars. I forgot to buy sour cream to serve with it, but for sour cream lovers I would stress serving it with this. 
I know I have fallen off the wagon with my cooking lately, but I promise, we only have one more week of hell (exams, moving, and cleaning and vacating the apartment) and I will be back to my regular self, hopefully...
Crock Pot Chicken Taco Chili
Source: Skinny Taste
Ingredients:

1 onion, chopped 
1 16-oz can black beans 
1 16-oz can kidney beans 
1 8-oz can tomato sauce
10 oz package frozen corn kernels
2 14.5-oz cans diced tomatoes w/chilies (used a 28 oz can of diced tomatoes)
1 packet taco seasoning 
1 tbsp cumin 
1 tbsp chili powder
24 0z. (3) boneless skinless chicken breasts 
chili peppers, chopped (optional)
chopped fresh cilantro 
  
Directions:

Combine beans, onion, chili peppers, corn, tomato sauce, cumin, chili powder and taco seasoning in a slow cooker. Place chicken on top and cover. Cook on low for 10 hours or on high for 6 hours. Half hour before serving, remove chicken and shred. Return chicken to slow cooker and stir in. Top with fresh cilantro. Also try it with low fat cheese and sour cream (extra points). 

Monday, February 25, 2013

Fried Rice with Chicken and Vegetables

We are in the middle of moving right now and I have totally dropped off the face of the earth in all social media. Moving while being sick with two small children and a husband in med school has meant a lot of take out and frozen dinners. I can't tell you how happy I was when I remembered I had some frozen meals that I made last month. But I have finally gotten around to finishing the 15 meals for $1.50 series with this Fried Rice. I'm not sad to be done with this series. It was good because it made me try some meals that I wouldn't normally choose and I did get some new recipes to add to my normal repertoire, but there were also quite a few duds in the mix. 
I really like fried rice, but not as a whole meal. I like it as a side dish for a yummy asian entree. But this was really great for me to be able to just get something on the table. I'd give this 4 stars as a side dish. This recipe is really versatile and you can put whatever you want or have into it. Perfect recipe for someone who hasn't had time to go shopping because they have been moving, or for any other reason.

Fried Rice
Source: Disney Family

Ingredients:

4 cups cold cooked rice
4 tablespoons soy sauce
1 clove garlic, minced (optional)
2 tablespoons thinly sliced green onion
2 cups cooked and cubed chicken (optional)
2 cups cooked veggies (optional)
2 tablespoons neutral oil, such as vegetable or canola 

Directions:
Heat a wok or large non-stick skillet over high heat. When oil starts to "shimmer", turn the heat to medium-high. If using garlic and/or green onions add to oil now and stir.


Add chicken and vegetables if using and mix well. Quickly add rice and continue to stir until rice is separated and coated with oil or mixed evenly with chicken and veggies.


Sprinkle soy sauce over rice and stir until distributed well throughout rice.

Monday, February 18, 2013

Barbecue Chicken Sanwiches

I made these as well when my sister was here. She loved them. Brian wasn't hungry when we had them for dinner and he was a little peeved at my sister when he saw her eating the leftovers for lunch the next day until he found out there was enough for him to have a sandwich too. So I'd say a little fight over the leftovers equals a pretty good recipe. I always like a good barbecue sandwich. They taste good and they are super easy, and we all know how much I love easy. I have found that the easiest way to make shredded chicken is to throw it in a slow cooker with some water and shred it after 5 or so hours on low. For this recipe I just put the chicken in the slow cooker with the barbecue sauce and let it cook. When it was ready I took 2 forks and pulled the chicken apart right in the cooker. It basically fell apart after cooking for so long. I would give this recipe 4 stars. There is nothing particularly special about it but it is a yummy, hearty meal.

Barbecue Chicken Sandwiches
Source: Disney Family

Ingredients:
1/2 cup shredded cooked chicken
1/4 cup shredded carrots
2 tbs barbecue sauce
2 tsp light ranch dressing
1 small whole-wheat sandwich bun
1 leaf romaine lettuce

Directions:
Combine chicken, carrots and barbecue sauce in a bowl. Spread ranch dressing on the bun. Top with the chicken micture and lettuce.


Monday, February 11, 2013

Cheeseburger Pie

As unappetizing as this "pie" looked in the picture, it was actually really good. I guess I'm just a cheeseburger type of girl at heart. Using crescent rolls as the crust was genius. It tasted so good! I guess I just never thought to combine all the ingredients of a cheeseburger into a casserole but it works. I really enjoyed the chopped up pickles in the beef. I might have to try chopping up pickles and putting them in the meat next time I make hamburgers. It's a really nice touch. But my favorite part of a burger has always been the pickle. 
This recipe was quick and easy to whip up, and it is pretty kid friendly. What kid doesn't want to eat a pie made of cheeseburgers? When I told Logan we were having cheeseburger pie he immediately paid attention. If you like cheeseburgers, this is definitely a 4 star recipe.

Cheeseburger Pie
Source: Disney Family

Ingredients:
1 can crescent rolls
1 pound ground beef
1/4 cup finely chopped onion, OR 1 teaspoon onion powder
1/3 cup chopped dill pickle slices
2 tablespoons ketchup
1 teaspoon prepared mustard
2 tablespoons flour
2 tablespoons dill pickle juice
2 tablespoons milk
2 cups shredded American cheese, divided


Directions:
Preheat oven to 375°.


Unroll crescent rolls and press into the bottom and up the sides of an 8 inch pie pan.


Cook ground beef in a skillet until browned. Drain well. Stir in onion, chopped pickle, ketchup and mustard. Sprinkle with flour and add pickle juice and milk. Cook and stir until thickened and bubbly. Remove from heat and add 1 cup of shredded cheese.


Pour into the prepared crust and bake for 15 minutes, or until edges of crust are golden brown. Remove from oven and top with remaining cup of cheese. Let stand until cheese melts.


Garnish with extra ketchup, mustard and pickle slices.

Friday, February 1, 2013

Chicken BBQ Cheddar Pitas

These were pretty good. And pretty easy to make. They were a fun little meal that was quick and easy for me to pull together after a long, crazy day. I always feel like a great little homemaker when I am able to set a yummy meal on the table even when I'm busy. If you like BBQ chicken pizza you'll like this. The pita acts like a normal crust, so they aren't much different than a thin crust pizza. And they are fun for kids to have individual sized pizzas. Not that you can't do that easily with real crust as well, but this is just quick. I didn't end up using 6 pitas. Maybe I just loaded the pizzas with more ingredients then they had intended, but it was still enough for our little family. I'd give these little guys 4 stars. Yum.
Chicken BBQ Cheddar Pitas
Source: Disney Family

Ingredients:
6 pitas
1 pound shredded chicken1 cup shredded cheddar cheese
3/4 to 1 cup barbecue sauce
1/4 cup sliced green onion*

Instructions:
Preheat oven to 400 degrees F. Using kitchen shears, cut pitas clear around the edge, making two pita halves.Top each pita half with chicken, barbecue sauce, cheese and green onion. Set pitas on a cookie sheet and bake for 8 to 10 minutes or until cheese is melted and bubbly.


Wednesday, January 23, 2013

Easy Chicken Lo Mein

The 15 meals under $1.50 pin said that every newlywed and college student needed to know these recipes, and this one definitely reminded me of meals I would make when Brian and I were newlyweds. That time in my life when I was just figuring out the cooking routine and didn't have much time to put into it. This Chicken Lo Mein is quick and easy, living up to it's name, and uses ingredients that I usually have lying around the house. I always like finding recipes that use ingredients that I usually have in my pantry for the days that I just need to whip something up quick without going to the store. For those of you who have a bit more time, I would recommend using fresh vegetables instead of frozen. With fresh vegetables this meal would be a 4 star. It's pretty dang good with frozen vegetables, but I can't ever manage to get the crispness that I get with fresh veggies. In summary, this is a great meal for under $1.50.

Easy Chicken Lo Mein
Source: Disney Family

Ingredients:
1 tablespoon oil-sesame or peanut oil
1 lb boneless skinless chicken breast, cut into thin slices
1 clove garlic, minced
2 tablespoons soy sauce or teriyaki sauce
2 teaspoons freshly grated ginger or 1 teaspoon powder
1 3-ounce package chicken flavor ramen noodle soup
1 1-lb bag frozen mixed oriental vegetables
1/4 cup water
Directions:
Heat oil in a large skillet over medium-high heat until hot. Add chicken and cook, stirring frequently, until no longer pink.

Add vegetables and lid. Cook until vegetables are cooked through, about 5 minutes.

In the meantime, cook the noodles (without the flavoring packet) according to package directions. Drain.

Add soy sauce, garlic, ginger and seasoning packet to water. Mix well. Pour over chicken and vegetables, add noodles and toss to mix.

Wednesday, January 16, 2013

Breakfast Pockets

Brian starts school pretty early in the mornings and needs a good breakfast to get him through a rigorous day of medical school. I usually try to get up and make him a good, hot breakfast but some mornings, especially after a long night with the kids, I just can't muster the energy to get up and make him something. That's where these breakfast pockets come in. You can make them ahead of time and freeze them for a quick microwave breakfast in the mornings. I'm not the biggest fan of sausage so I was a little wary of these, but they actually turned out really good. The dough was super easy to make. I'm not a dough person; Brian bought me a bread maker for Christmas so I wouldn't have to deal with bread dough. But this dough was really yummy and was no problem at all for me to whip up. 
I would give these little guys 4 stars, and that's a big rating for me to give a breakfast item not containing syrup. Although these might taste really good if I dip them in a bit of syrup, I might have to try that! I ate mine with ketchup and it was great. These pockets could also be altered to contain any filling you could want. I might try using bacon next time instead of sausage. Yes, there will definitely be a next time.
Breakfast Pockets

Ingredients:
Dough:
1 1/2 tblsp yeast
1/2 c warm water (110 degrees)
3/4 c evaporated milk (110 degrees)
1/2 c vegetable oil
1/4 c sugar
1 egg
1 tsp salt
3 1/2 c flour


Filling:
1 lb bulk sausage
1/2 c onion, chopped
1 1/2 c frozen hashbrown potatoes, thawed
7 large eggs
3 tblsp milk
1/2 tsp salt
1/2 tsp pepper
1/2 tsp garlic salt
pinch of cayenne pepper
2 c cheddar cheese, shredded

Instructions:
Dough:In a bowl, dissolve yeast in the water.


Add milk, oil, sugar, egg, salt, and 2 cups flour; beat until smooth.


Add enough flour until it makes a soft dough but do not knead. Cover and let rise in a warm place until doubled, about 1 hour.

Filling:
Cook the sausage and onion over medium heat until browned. Drain. Add the hashbrowns, eggs, milk, and spices. Cook and stir until set. Sprinkle with cheese and keep warm.


Assembling the pockets:
Preheat oven to 350°.
Punch down the dough and cut into 16 equal pieces.
Roll each piece into 7 in circle on a floured surface. Top with 1/3 c filling, fold, and pinch shut. Bake for 15-20 minutes.
To freeze:
Allow to cool on the baking sheet. Once cooled, place in the freezer until frozen. Store in a ziploc bag in the freezer for 3-6 months. To reheat, place on a paper towel and microwave for 1 1/2-2 minutes.

Sunday, January 13, 2013

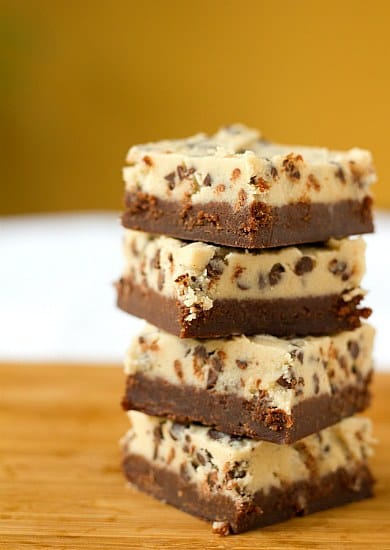
Chocolate Chip Cookie Dough Brownies

Before I made these brownies I don't think I had ever made brownies from scratch before. I always used a box mix. It's easy and fast to just throw the mix in with some oil and eggs and be done with it. But after this recipe I might make all my brownies from scratch. 
Having a baby right before the holidays makes it really hard to watch my calorie intake. Logan's Halloween candy along with Christmas baking have been just to tempting for me. And these brownies are so not good for my post-baby weight loss. I've been forcing to limit myself to one brownie a day. If you like cookie dough and brownies you will like this. I had one with ice cream last night and it was even better. Ice cream makes everything better though! Brian can't get enough of these brownies and I have heard him telling more then one person about them. He'd probably give them 5 stars, but I'm going to give them a 4; a very respectable rating. Give them a try and see how you would rate them!


Chocolate Chip Cookie Dough Brownies
Source: Brown Eyed Baker

Ingredients:

For the Brownie:
4 ounces unsweetened chocolate, finely chopped
1 cup unsalted butter, at room temperature
2 cups light brown sugar
4 eggs
2 teaspoons vanilla extract
1 cup all-purpose flour
For the Cookie Dough:
¾ cup unsalted butter
¾ cup light brown sugar
¾ cup granulated sugar
3 tablespoons whole milk
1½ teaspoons vanilla extract
1½ cups all-purpose flour
1½ cups mini chocolate chips
Directions:
Prepare the Brownies: Preheat oven to 325 degrees F. Line a 9x13-inch pan with foil, with enough to hang over all four sides. Butter the foil. In a medium glass bowl, melt the chocolate in the microwave in 30-second increments, stirring after each, until melted and smooth. Set aside to cool slightly. In a large mixing bowl, mix the butter and brown sugar with an electric mixer on medium speed until light and fluffy. Beat in the eggs and vanilla extract, scraping the bowl as needed. Mix in the melted chocolate until combined. Reduce the speed to low, add the flour and mix just until combined (don't over-mix). Spread the batter into the prepared pan. Bake 25 to 35 minutes, or until a toothpick inserted into the center comes out clean. Let cool completely.
Prepare the Cookie Dough: In a medium bowl, use an electric mixer on medium speed to combine the butter and both sugars. Add the milk and vanilla and mix until combined. Reduce the speed to low and mix in the flour just until combined. Using a rubber spatula, stir in the chocolate chips.
3. Spread the cookie dough over the cooled brownies. Refrigerate until the dough is firm, about an hour. Use a sharp knife or a pizza cutter (my favorite way to slice brownies!) to cut the brownies. Store the brownies in an airtight container at cool room temperature or in the refrigerator.

Thursday, January 3, 2013

Veggie and Quinoa Burritos

This is a vegan recipe and I am not a vegan, but that doesn't mean I can't enjoy it. I'd give it 4 stars. I'm not sure what would make it better. I liked it and had seconds. Logan ate it. It just wasn't knock your socks off good. But I probably will make it again. I bought a huge bag of quinoa from Costco and have been searching for recipes to use it. The last, and only, quinoa dish I made was the Southwestern Quinoa Salad and Logan would not touch it. Finding recipes that Logan will eat and Brian and I will enjoy is always great. The recipe uses shredded sauteed zucchini and you can hardly tell it is there. I love being able to sneak some vegetables into Logan. He has a few favorites - corn, peas, tomatoes - but he wont even give a lot of them a try. I'm sure that is a problem for a lot of you mom's out there, so this recipe might be a keeper for you too! It's kid friendly and easily personalizable if you have super picky eaters or allergies. The only thing I would do differently is to make more of the sour cream mixture. I love sour cream and I wanted to dip my burrito in it. Super healthy, I know.


Veggie and Quinoa Burritos

Ingredients:
1 onion, chopped
1 jalapeno, seeded and minced (optional)
½ cup quinoa, rinsed
4 cloves garlic, minced
2/3 cup vegetable broth
1/3 cup vegan or low fat sour cream OR Greek yogurt
1 tablespoon chopped fresh cilantro
2 teaspoons lime juice
1/8 tablespoon chipotle chili pepper powder (optional)
1 cup frozen corn, thawed
¾ cup shredded zucchini
¾ cup chopped tomatoes
4 whole wheat or gluten free tortillas
1 cup Daiya Pepper Jack or Cheddar Cheese
For serving: Salsa and/or Guacamole (optional)

Instructions:
Spray a medium saucepan with organic canola spray. Add onion and jalapeno and cook for 8 to 10 minutes, until tender. Add quinoa and garlic and sauté for one minute. Add vegetable broth and bring to a simmer. Reduce heat to low and cover. Cook for 30 to 35 minutes. Remove from heat and allow to sit covered for 5 more minutes.

In a small bowl combine sour cream, cilantro, lime juice and chipotle chili pepper.
Heat a large skillet to medium high heat and spray with canola oil spray. Add corn and zucchini and cook for 2 minutes. Add tomatoes and cook for one additional minute. 

Remove vegetables from heat and wipe pan carefully with paper towels.
Heat tortillas a few minutes per side. Spread with a thin layer of sour cream. Top with ¼ cup cheese, ¼ of the quinoa and ¼ of the vegetable mixture. Roll up using toothpicks to secure.

Return skillet to medium heat and spray with olive oil. Add 2 burritos to pan and cook each side until browned.


Tuesday, January 1, 2013

Butter Chicken

My sister and I have a favorite Indian restaurant back home that makes the best Butter Chicken ever. Brian and I went there once to try it out and thankfully I ordered the Butter Chicken. The rest is history and it is now one of my favorite restaurants. But now that I am in Houston I can't just head on down to the Spice Hut anymore. I've been meaning to try and make my own Butter Chicken and as I was pinteresting this weekend I found this recipe. I've been hesitant to try my own Indian food because I was under the impression that it would be hard/time consuming to make but this recipe was very easy. Apparently McCormick makes garam masala seasoning as part of their gourmet collection but I couldn't find any at my local grocery store. So Brian and I just made our own. There are recipes for it all over the internet and they are all fairly similar, so just pick one. We made extra for next time.

Now on to the review. I would give this recipe 4 stars. It's not as good as the Spice Hut's Butter Chicken, but if you've never had it there then you won't know what you're missing. It makes a lot, especially for our family of 4, so I was able to freeze some for an easy meal in the future. Brian likes his chicken swimming in the sauce, so we would either add less chicken or make more sauce next time. The recipe also says to serve with pita bread. We did this and it was pretty good, but if you can get your hands on some Naan that would obviously be better. The recipe is easy to tweak to suit your own preferences, but I think the original is great without any adjustments and will definitely be added to my regular rotation of meals.

Butter Chicken

Ingredients

Spice Blend:
  • 1 tablespoon garam masala seasoning
  • 1 1/2 teaspoons ground ginger
  • 1/2 teaspoon ground cinnamon
  • 1/4 teaspoon cayenne

Sauce:
  • 3 tablespoons butter
  • 1 large onion, chopped (about 1 cup)
  • 2 teaspoons jarred minced garlic
  • 1 tablespoon tomato paste
  • 1 (15-ounce) can tomato sauce
  • 1 (14 1/2-ounce) can diced tomatoes in juice
  • 1 skinless rotisserie chicken, boned out and pulled into 1 1/2 by 1/2-inch chunks
  • 1 (10-ounce) box frozen peas, placed in a colander and run under hot water to thaw
  • 1/3 cup heavy whipping cream
  • Hot basmati rice, for serving
  • Pita bread, warmed according to package directions, for serving

Directions
To make the spice blend: Stir the ingredients together in a small bowl and set aside.
To make the sauce: Melt the butter in a 12-inch nonstick skillet over medium heat. Add the onion and cook, stirring frequently, until the pieces just begin to turn gold, about 5 minutes. Add the garlic, tomato paste and spice blend, and cook for 1 minute, stirring constantly to prevent burning. The spices will be fragrant. Add the tomato sauce and diced tomatoes and stir will. Add the chicken pieces, spoon the sauce over the top and bring to a simmer. Turn the heat to low and cook, uncovered, until the chicken is warmed through and the sauce is flavorful, about 10 minutes. Stir frequently. Remove the chicken to a serving dish and cover to keep warm.
Shake any excess water from the peas. Add the peas and cream to the sauce in the pan, stir well and heat through. Do not boil. Spoon the sauce over the chicken. Serve with rice and warmed pita bread.
Variation: If you prefer shreds of chicken to whole pieces, remove the skin from the chicken and pull the meat into large chunks by hand. Add to the pan along with the garlic, tomato paste and spice blend. Cook for 3 minutes and then add the tomato sauce and continue with the recipe. Serve over basmati rice.


Raspberry Lemonade Bars

I would give this recipe 4 stars. You know when you put a lot of time into something and expect it to be amazing but your expectations are always too high. That's what happened with these. I didn't really read the steps involved in this one, and it ended up taking an entire afternoon to make them. Don't get me wrong, they were really good. And everyone who tried one loved them, but for the amount of time I put in to them I was expecting phenomenal, knock-your-socks-off good. So go ahead and make them, but just expect it to take you time. Or, better yet, get someone else to make them for you!


Raspberry Lemonade Bars
Source: Annie's Eats

Ingredients:
For the crust
2 1/4 sticks (18 tbs) unsalted butter at room temperature
1/2 cup sugar
2 cups all purpose flour
1/2 tsp. salt
For the filling
3 cups sugar
1 1/3 cups all purpose flour
3 tbs. lemon zest
1/4 tsp salt
3 cups frozen raspberries, thawed
6 large egg whites
2 large eggs
1 1/3 cups freshly squeezed lemon juice
Confectioners sugar for dusting

Directions:
Preheat the oven to 350˚ F.  Line a 9 x 13-inch baking pan with parchment paper.  In the bowl of an electric mixer, combine the butter and sugar.  Beat on medium-high speed until smooth, 1-2 minutes.  With the mixer on low speed, mix in the flour and salt just until incorporated.  Add the dough to the prepared baking pan.  Press into an even layer over the bottom of the pan.  Bake for about 25 minutes or until light golden brown.  Remove from the oven, maintaining the temperature.


While the crust is baking, make the top layer.  Combine the sugar, flour, lemon zest and salt in a large bowl and whisk to blend.  Add the raspberries to a fine mesh sieve and press through, mashing with a spatula, to extract as much juice and pulp as possible, straining out the seeds.  Add the egg whites and eggs to the bowl with the dry ingredients and whisk well to blend.  Whisk in the raspberry puree and lemon juice until smooth.


Pour the mixture over the crust and bake until the center is just set and not longer jiggles when gently shaken, about 35-40 minutes.  Transfer to a wire rack to cool to room temperature.  Cover and chill well in the refrigerator, at least 2 hours.  When ready to serve, use the parchment paper to lift the bars from the pan.  Place on a cutting board and slice into bars.  Dust the tops with confectioners’ sugar if desired.